Continuous Integration (CI)
Overview
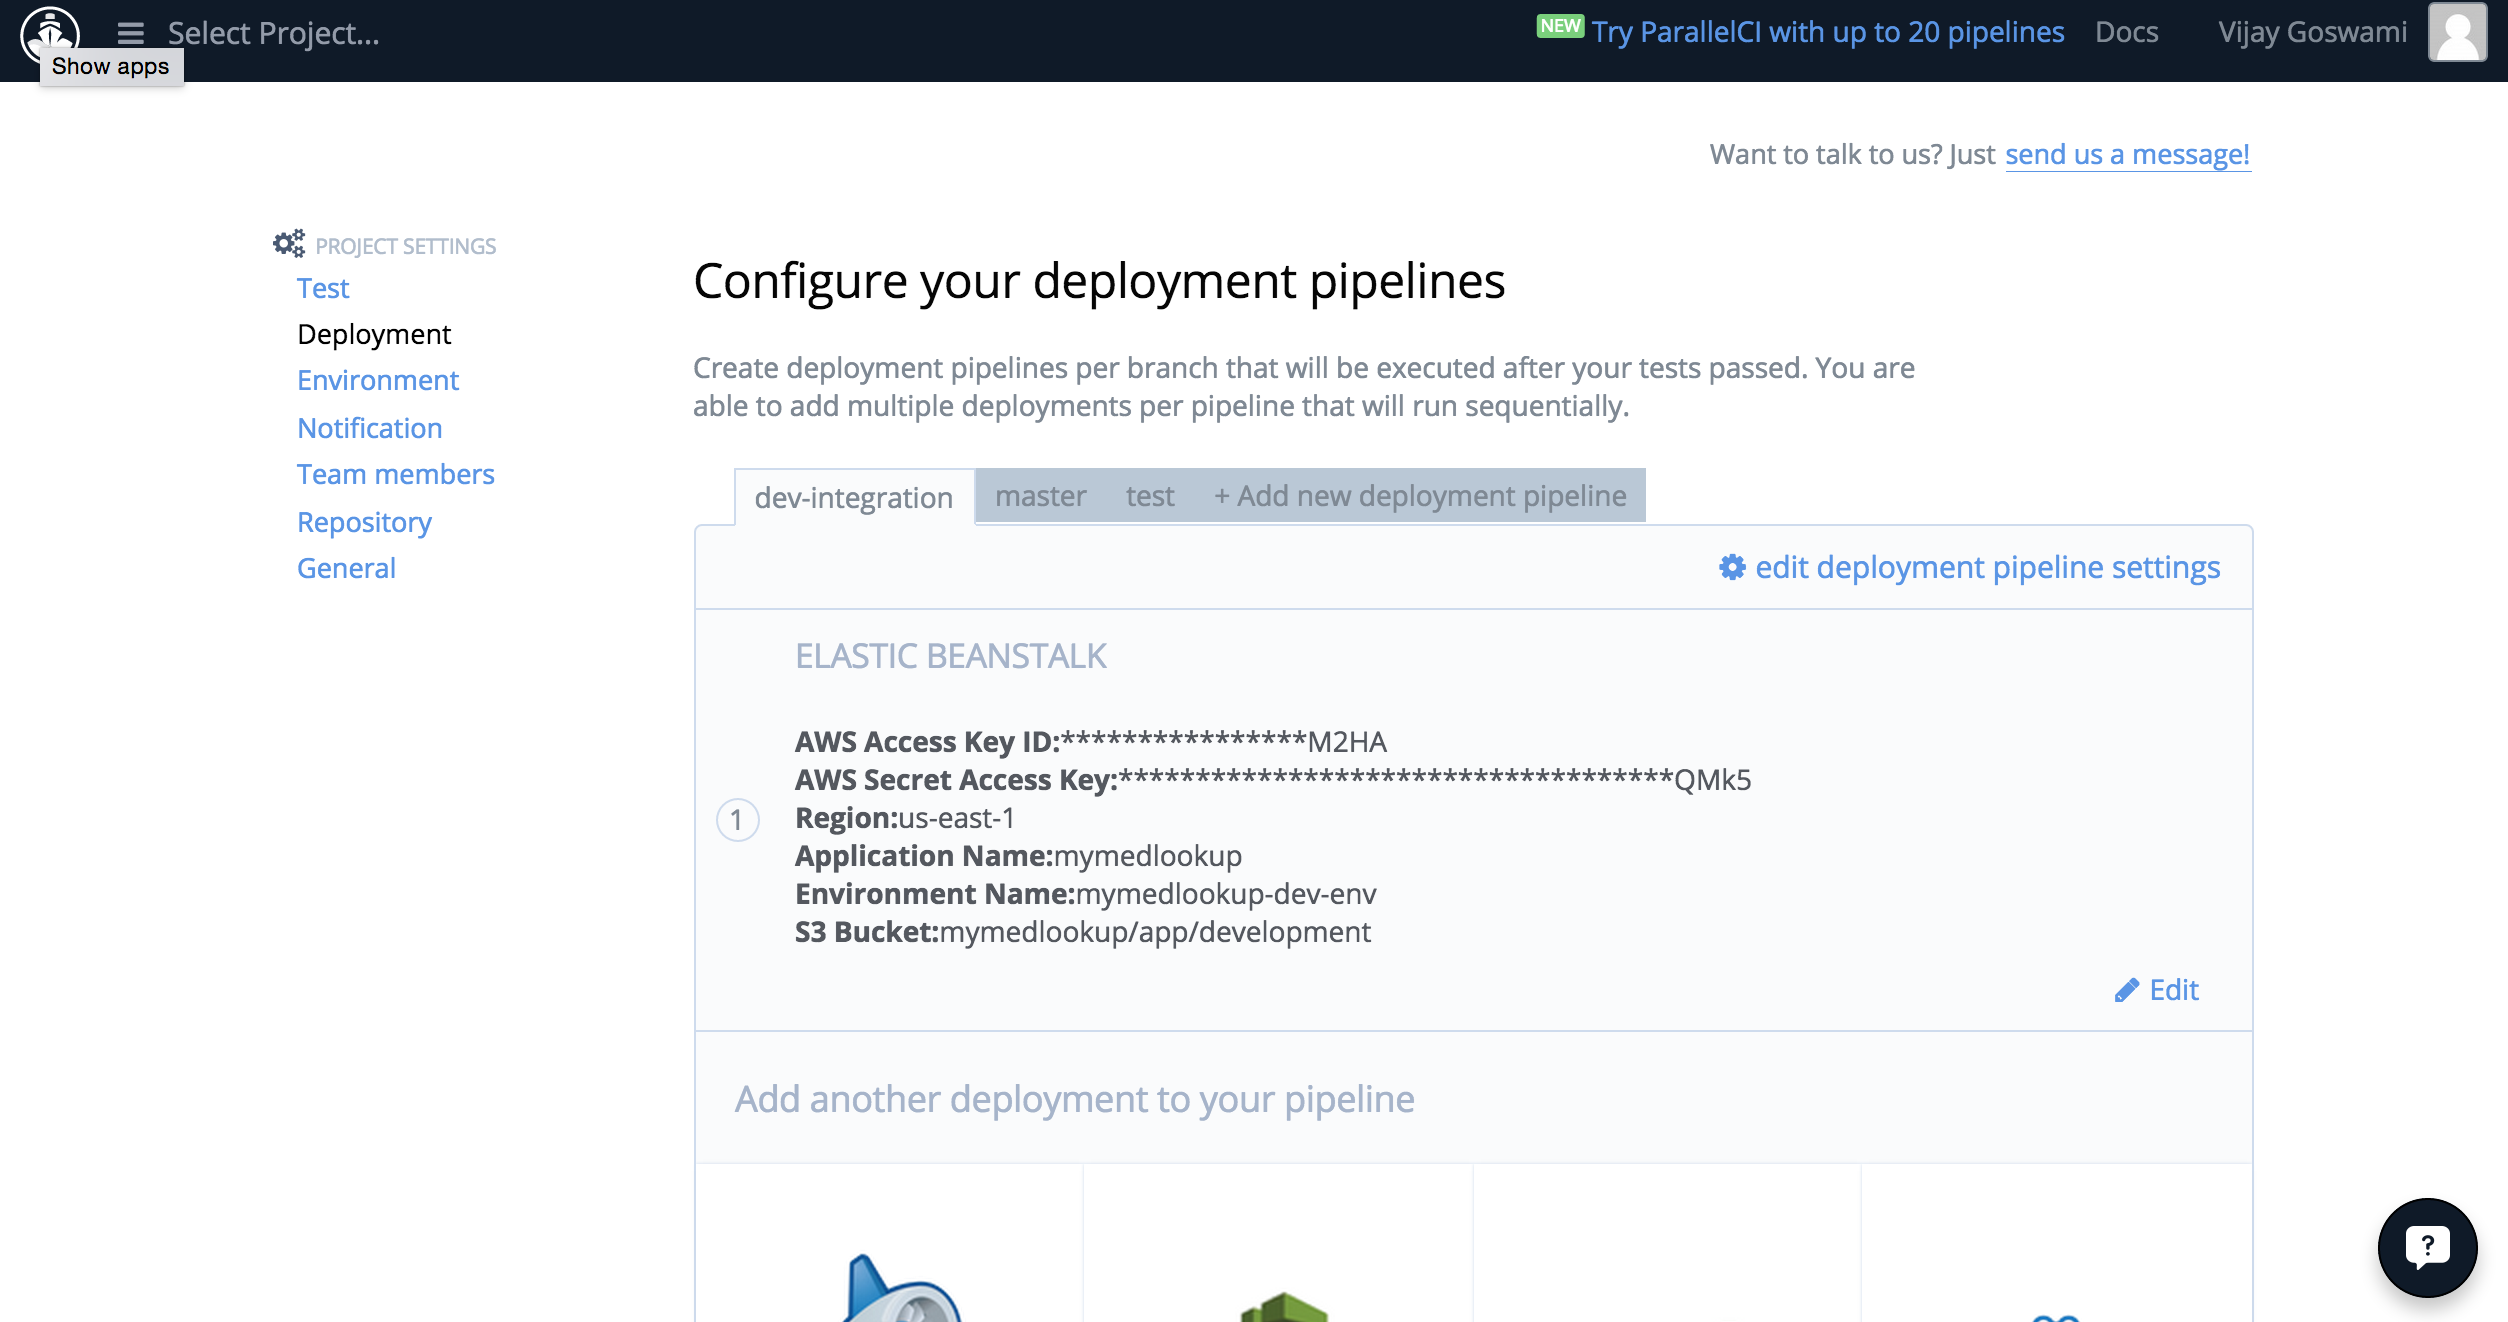
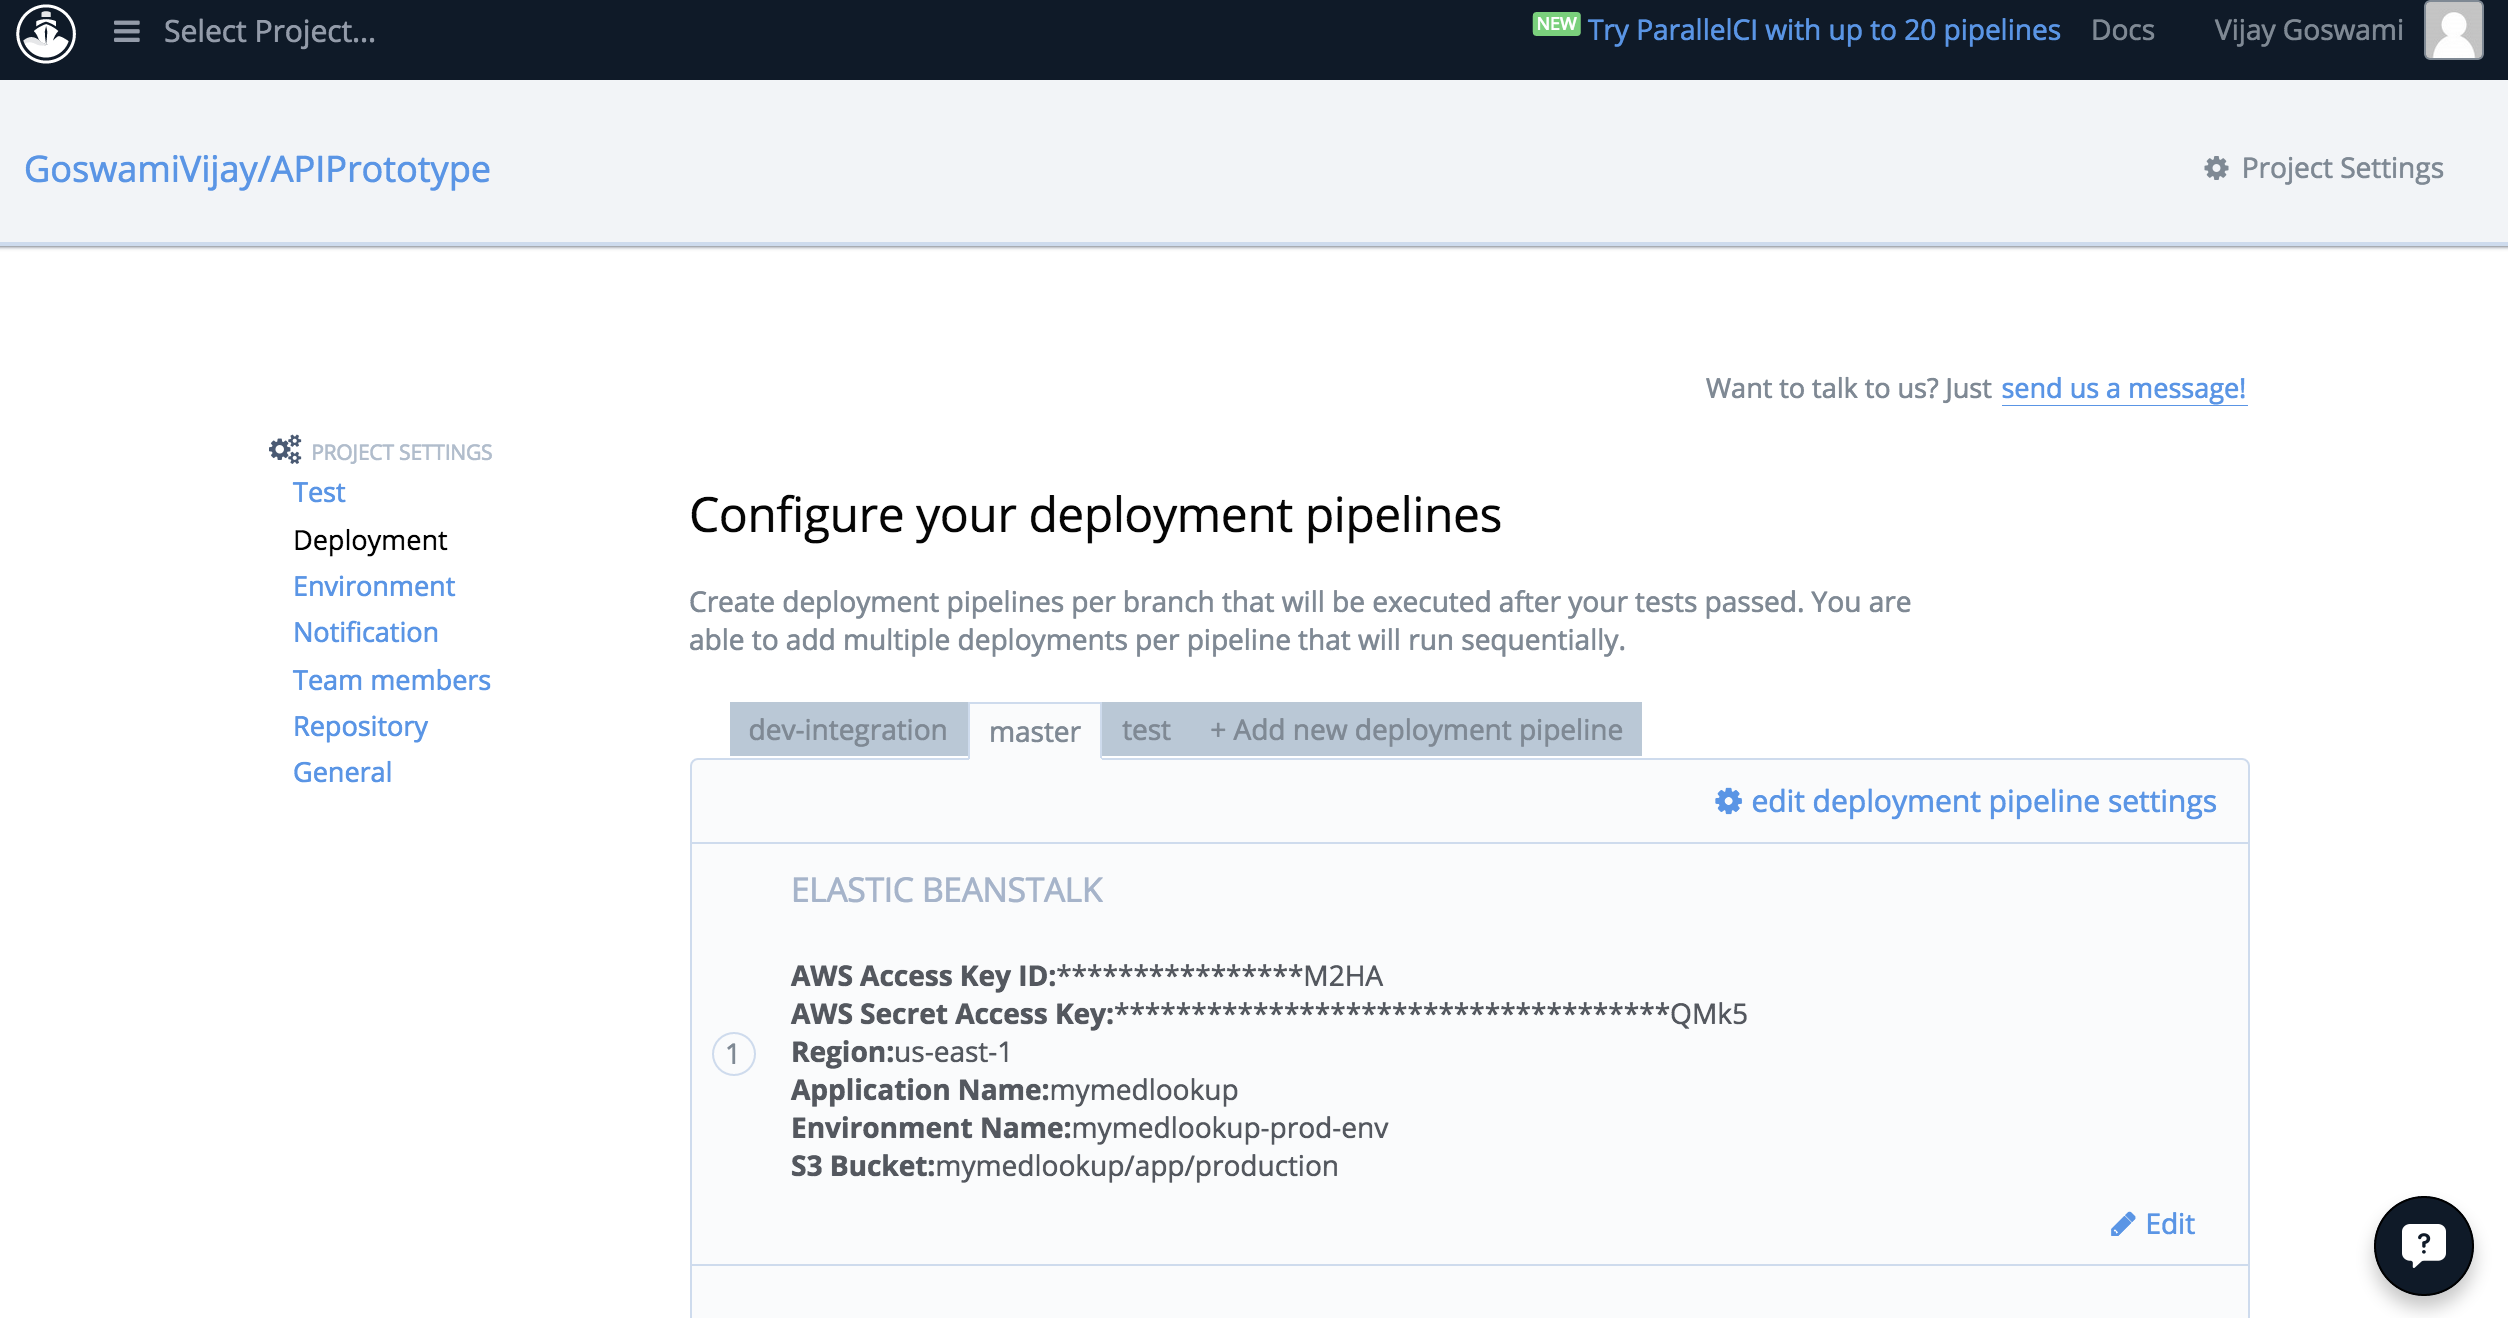
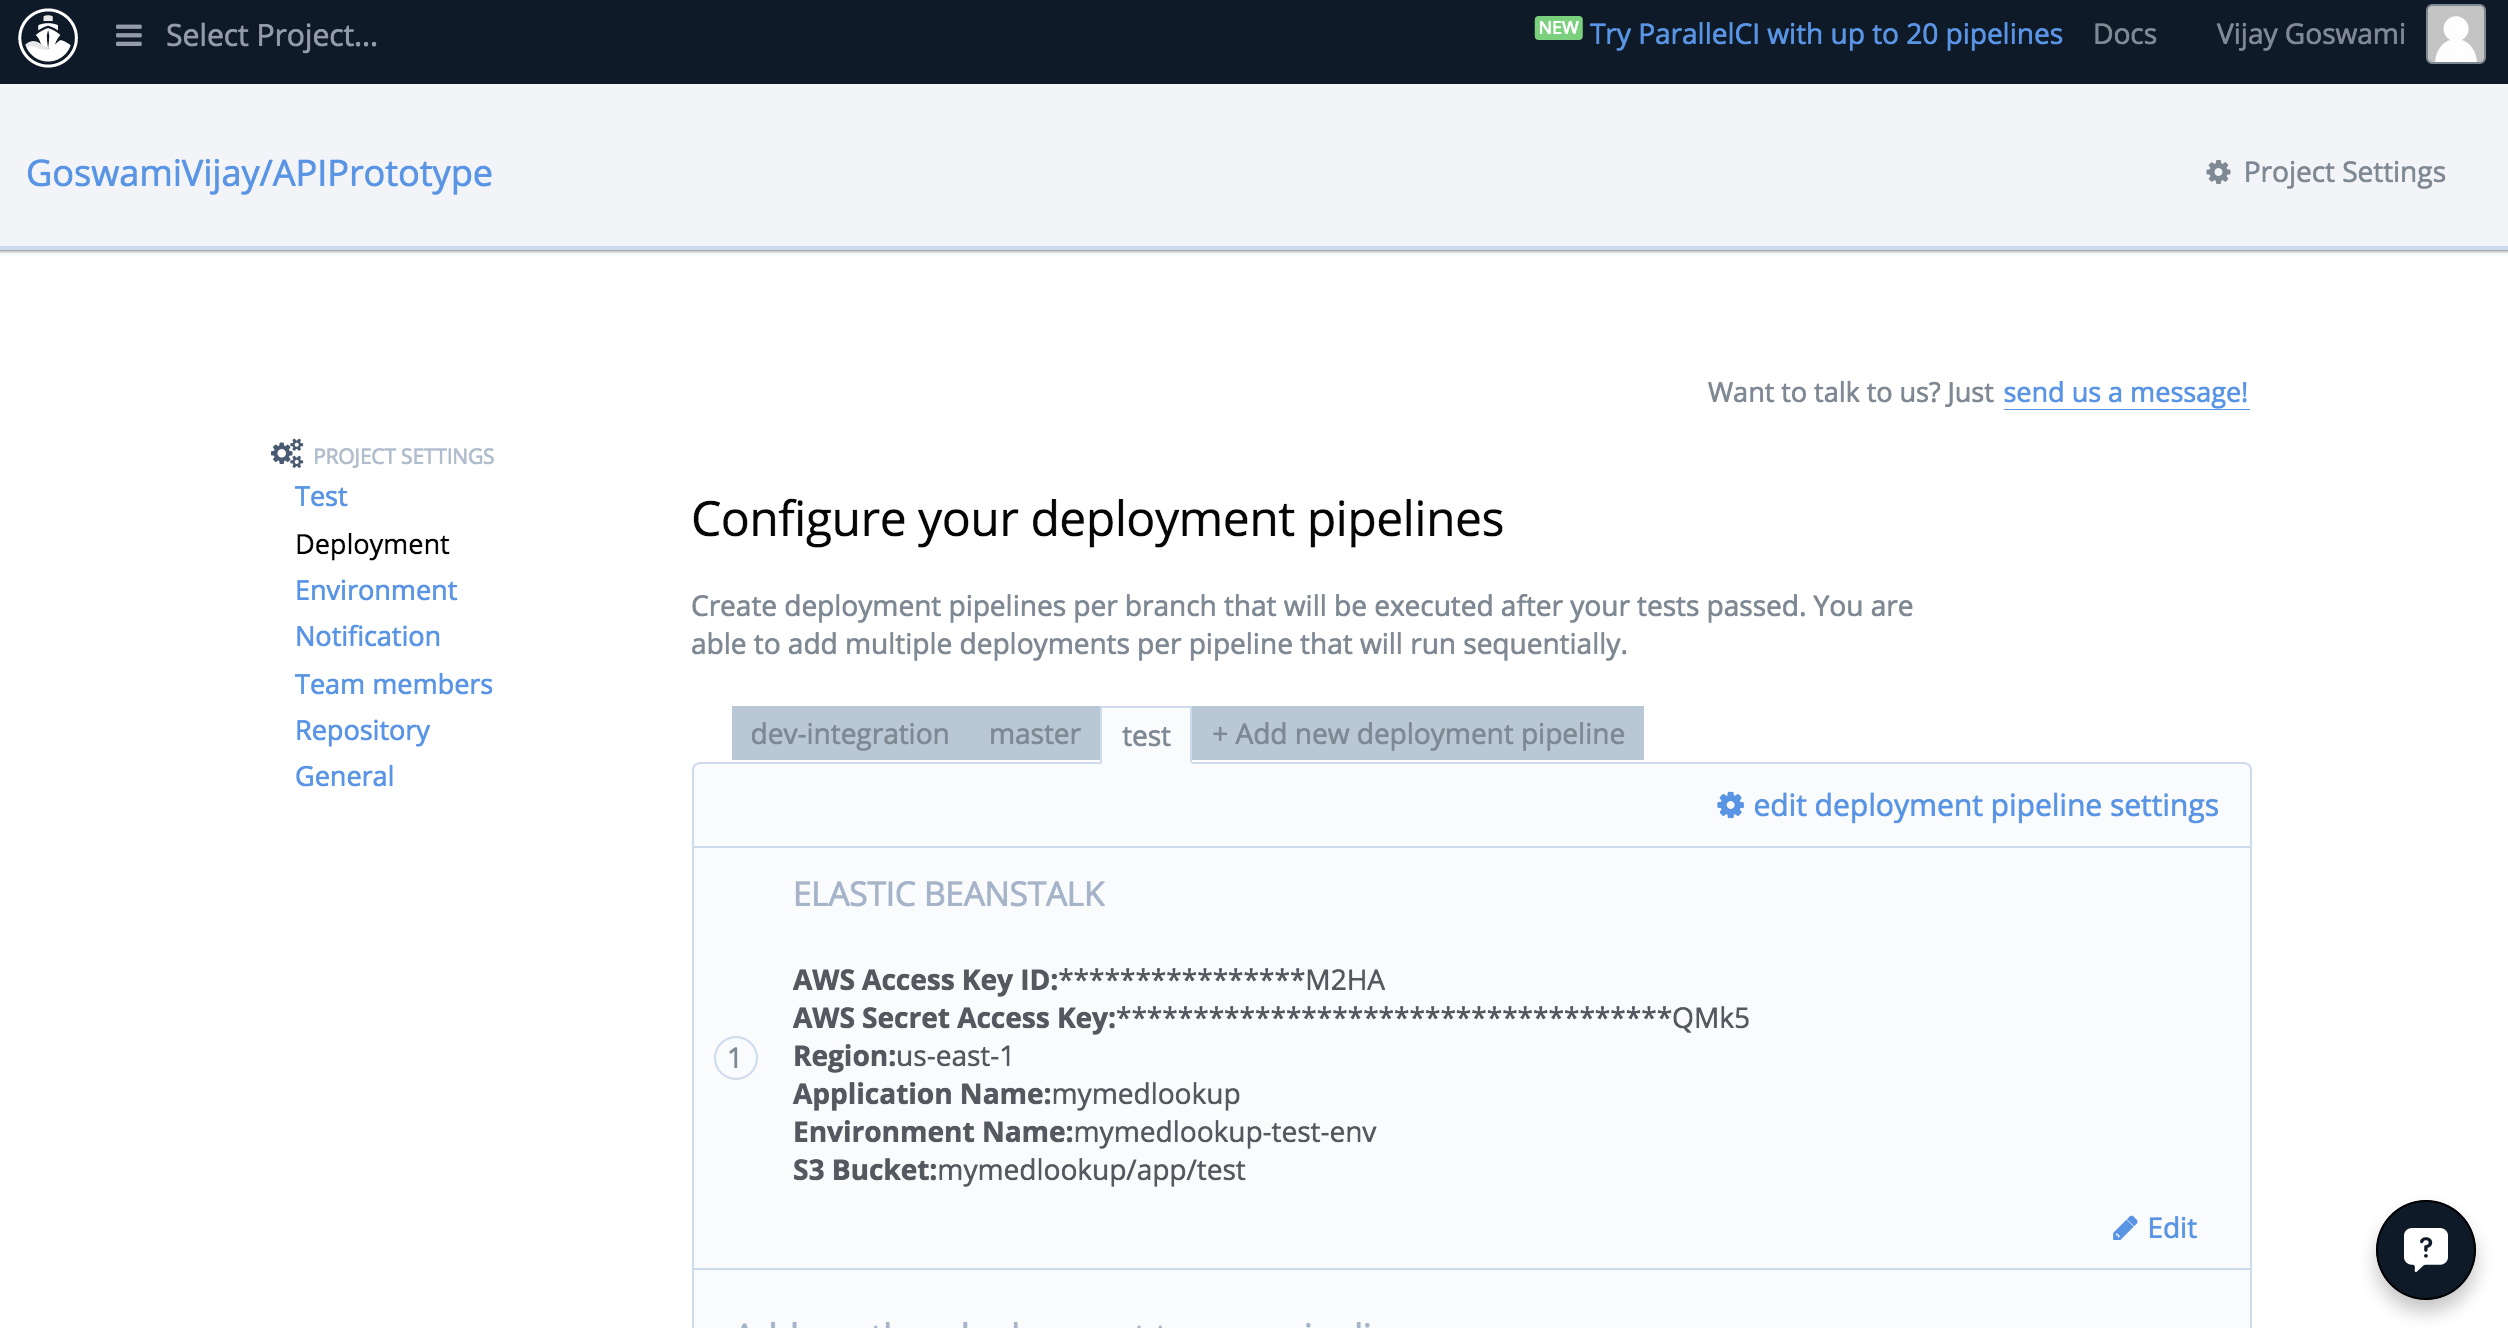
We use Codeship for implemeting continuous build, test and deployment of My Medication List application. We chose Codeship for it's ability to deploy passed builds to Elastic Beanstalk which other CI tools were lacking. Codeship, however, does not provide the ability to select the branches that will be unit tested which is a shortcoming. The current CI workflow is as follows 1. Codeship has been configured to watch the github repository 2. Changes pushed to the repsoitory trigger a build and running of unit tests 3. If a build passes, the deployment pipeline for that branch is executed and the environment associated with that pipeline is updated with latest code. The following table shows the mapping between branches in github and the deployment pipeline associated with that branch.
| Github branch | Codeship deployment pipeline | Application environment |
|---|---|---|
| master | master | www.mymedlookup.org |
| test | test | test.mymedlookup.org |
| dev-integration | dev-integration | production |
dev-integration branch deployment settings

master/production branch deployment settings

test branch deployment settings

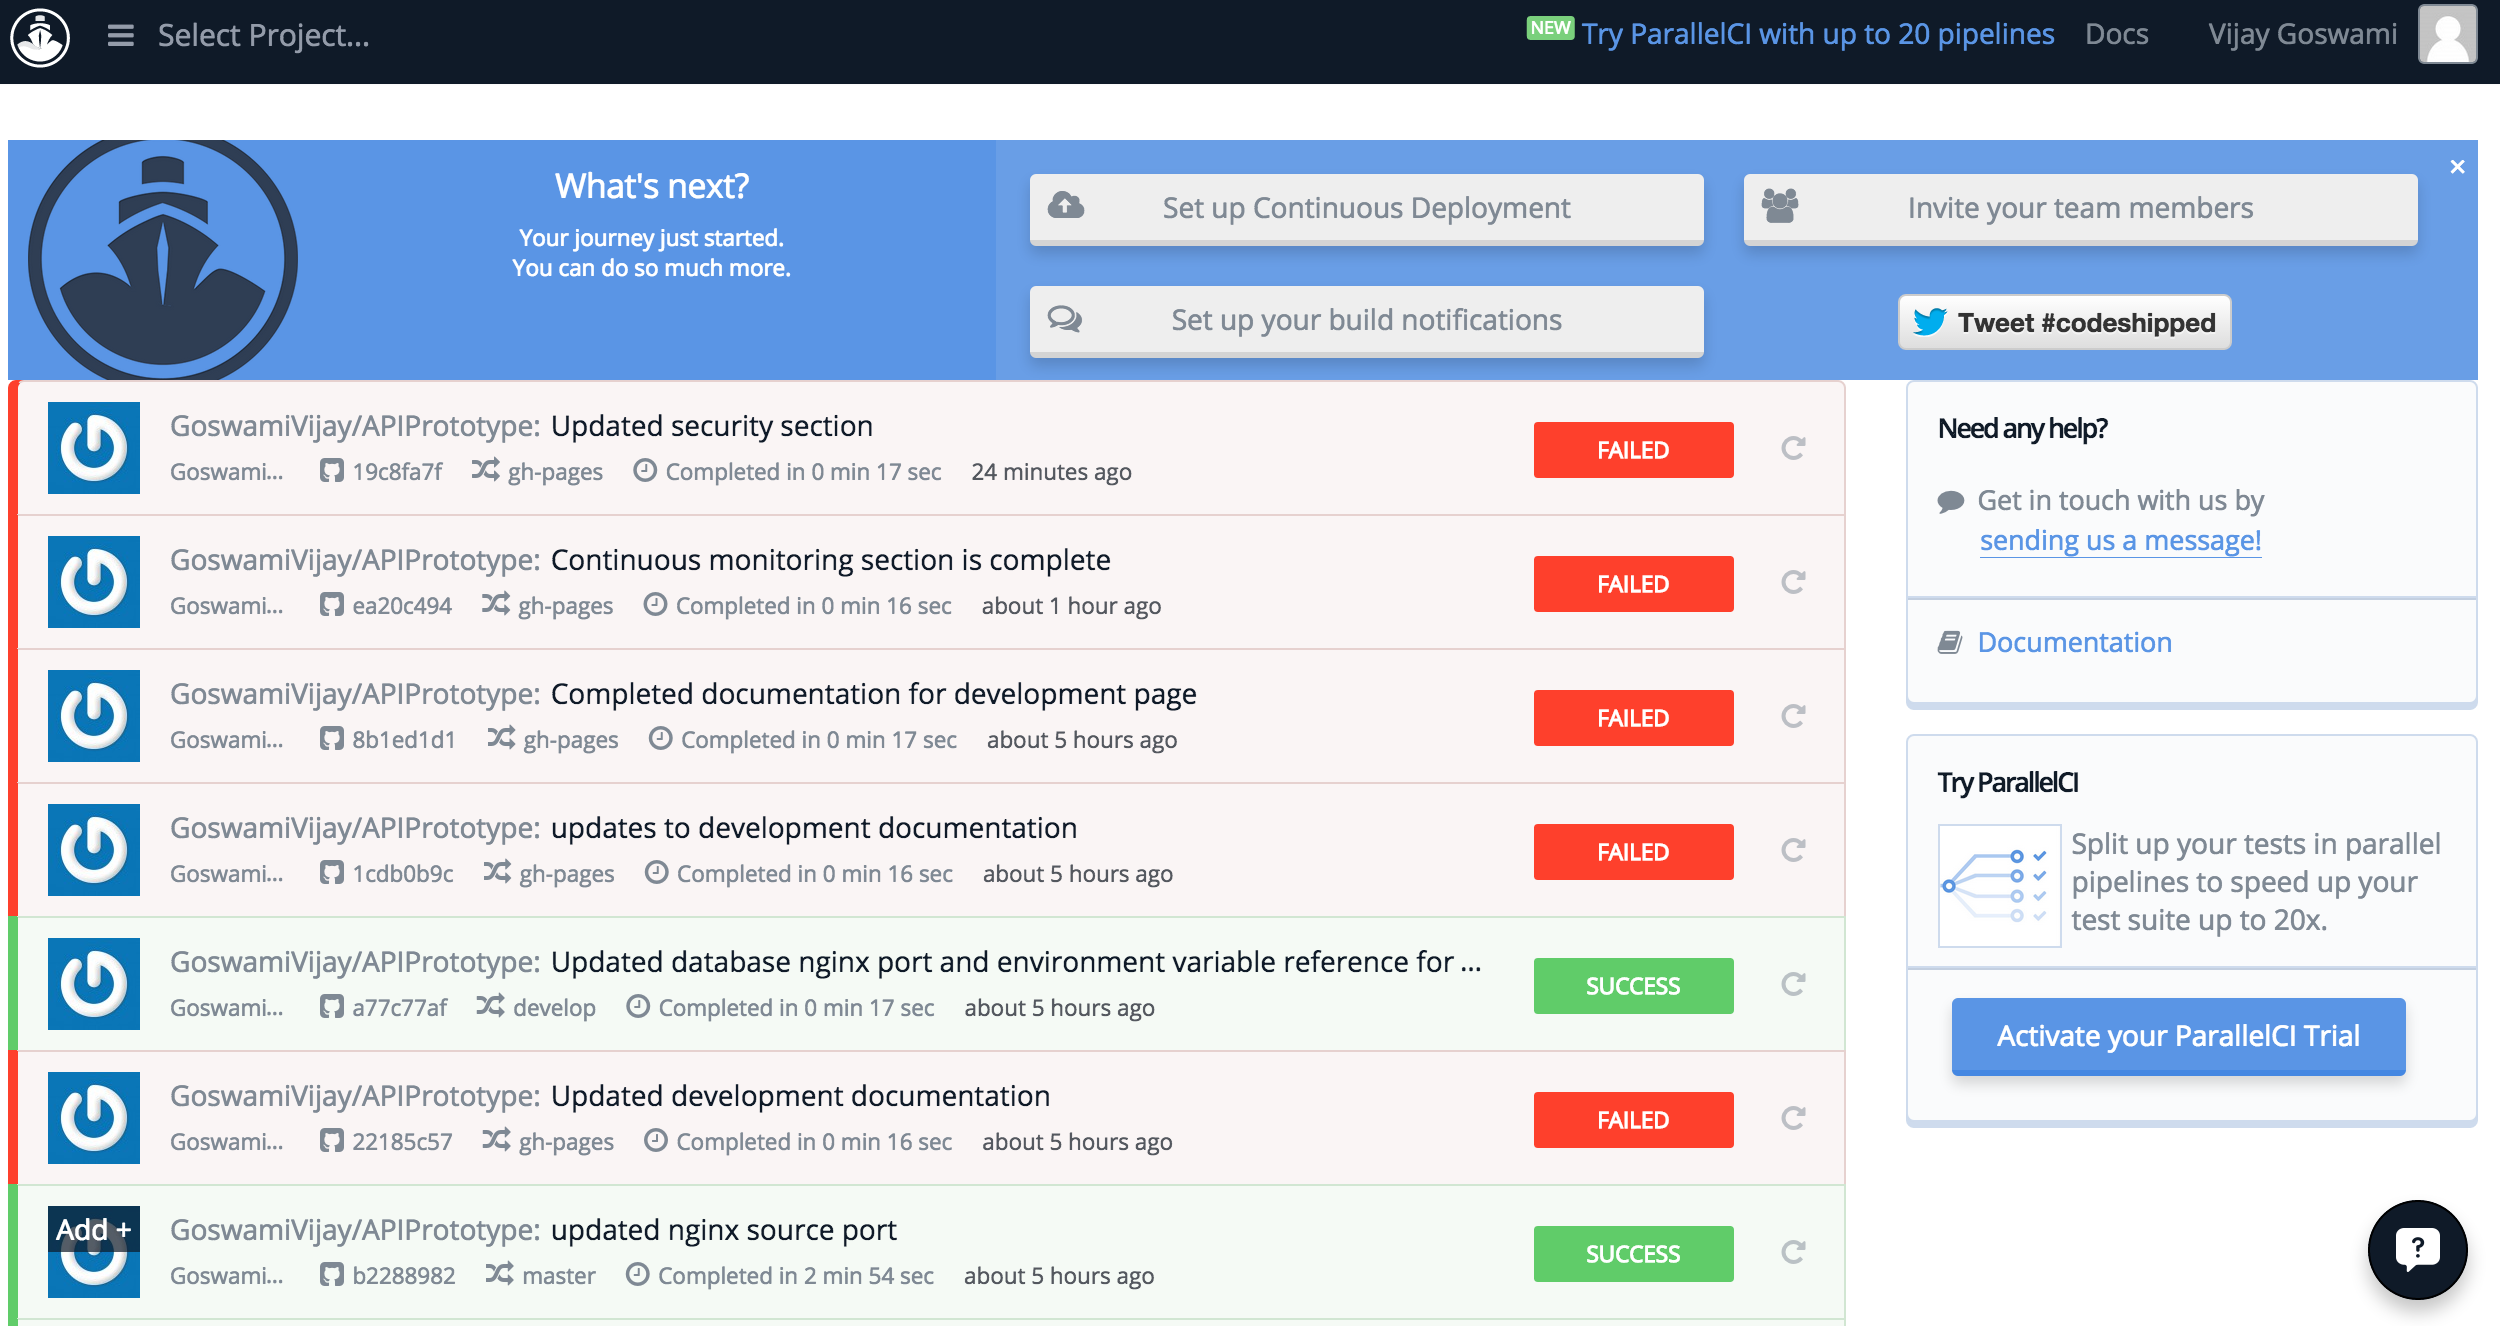
Build results

Setting up continuous integration on Codeship
To use Codeship for setting up continuous integration (CI), please create a free account on Codeship. It is preferred and recommended to use your github account. You can use the free tier that gives you 100 builds per month https://codeship.com/pricing.
The instructions for using Codeship to deploy to AWS Elastic Beanstalk are here
You need to setup the Elastic Beanstalk environment based on deployment instructions and also will need a S3 bucket where Codeship will save a copy of the package before deploying it to Elastic Beanstalk.
A brief step by step instructions are as follows 1. Login to Codeship 2. From the main screen select the Create a new project menu option from the Select Project... menu located on top left of the page. This will start a 3 step wizard. 3. Select the "Connect with Github repository" option for the Connect Your SCM step 4. In the Choose Your Repository step, select the repository for which you would like to setup CI 5. On the Configure Project step, select node.js option from the drop down box for Select your technology to prepopulate basic commands field. 6. Add the following command in the Configure Test Pipelines window (2nd console window on the page)
mocha test
Comment the line that says npm test
This is what the Configure Test Pipelines window should look like
mocha test
Click Save and go to dashboard button (bottom right of the page).
Push a change to the repository for the Codeship build and test to take place. After the first build is done, you will be able to configure the deployment pipeline for the repo.
Please use the instructions here for setting up the deployment pipeline.